Is your Staten Island home drafty and expensive to heat? Many older detached homes here have under-insulated walls or failing fiberglass batts. Our interior injection foam retrofit is the perfect solution for Colonial, Cape Cod, and other classic styles. We work from inside your home, injecting high-performance foam into your wall cavities without tearing apart your exterior siding or interior finishes. This method creates a seamless air and thermal barrier that blocks ocean winds from the Verrazzano Narrows, reduces outdoor noise, and combats moisture in our coastal climate. Protect your home’s character while achieving modern comfort and up to 40% energy savings without full wall demolition.
Many pre-1980 homes in NYC still rely on fiberglass batts that were never designed to last decades. Over time, fiberglass:
This is why heating and cooling costs keep rising — even when your HVAC system is working perfectly.
Injection foam insulation is installed from inside the home, making it ideal for attached homes, brownstones, townhouses, and properties where exterior access is limited.
We provide expert interior injection foam insulation throughout New York City and surrounding areas. Check if we service your location.
How contractors and inspectors understand the professional retrofit process from start to finish
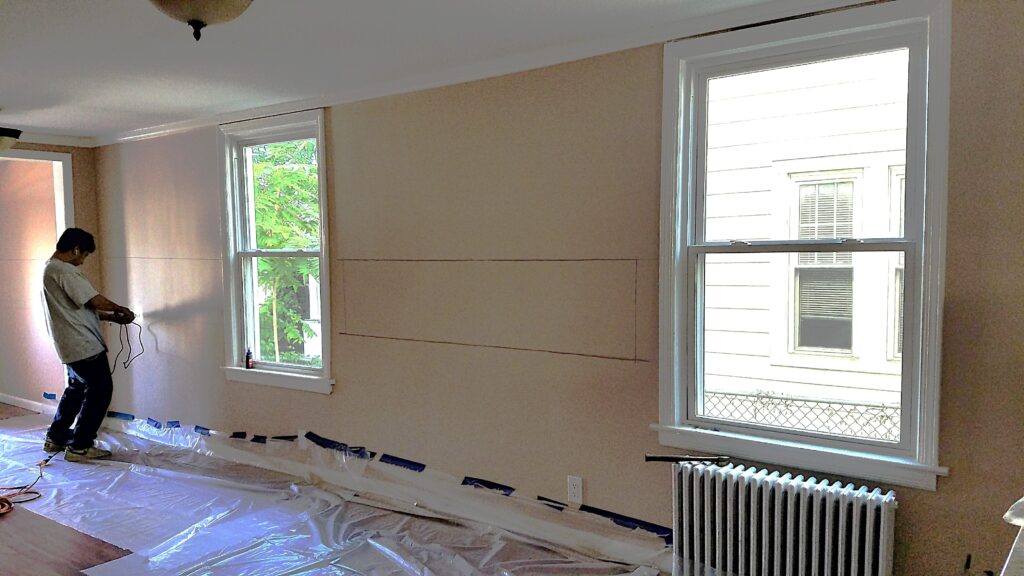
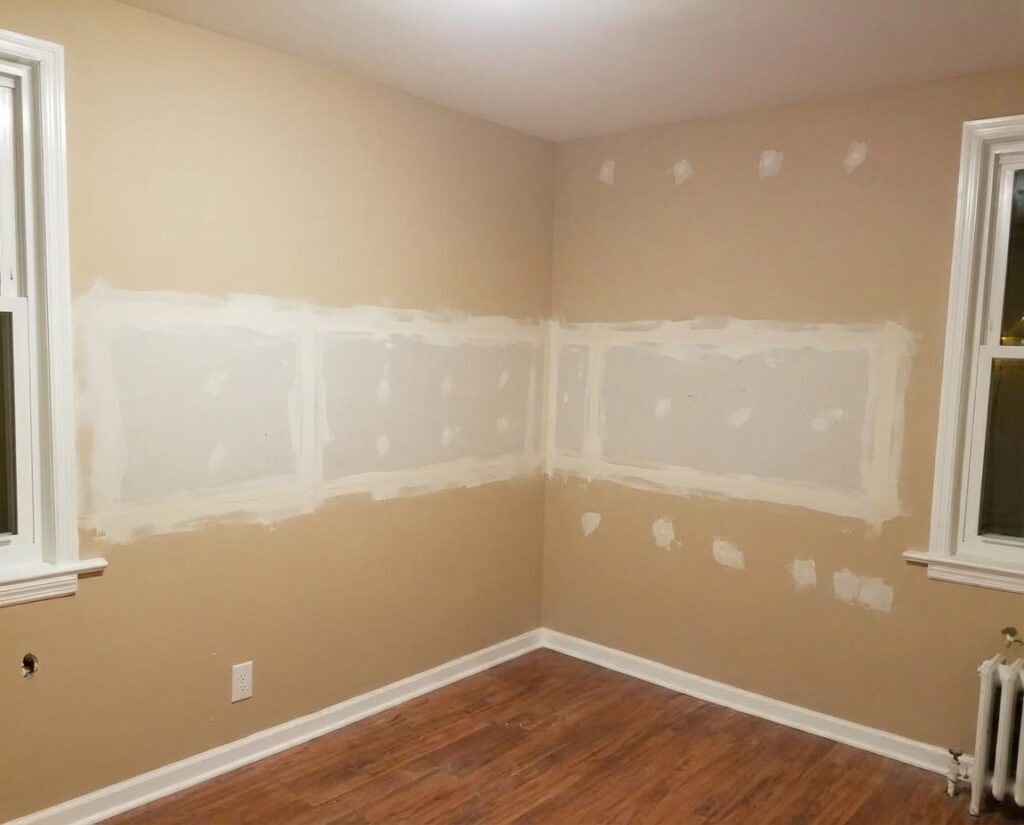
What the picture shows
An interior wall with chalk lines or cut marks between studs, usually in horizontal strips (12–24 inches high).
This image shows the first retrofit step from the inside. Instead of disturbing exterior siding, installers remove controlled sections of drywall to access wall cavities directly.
Why this matters
1
2
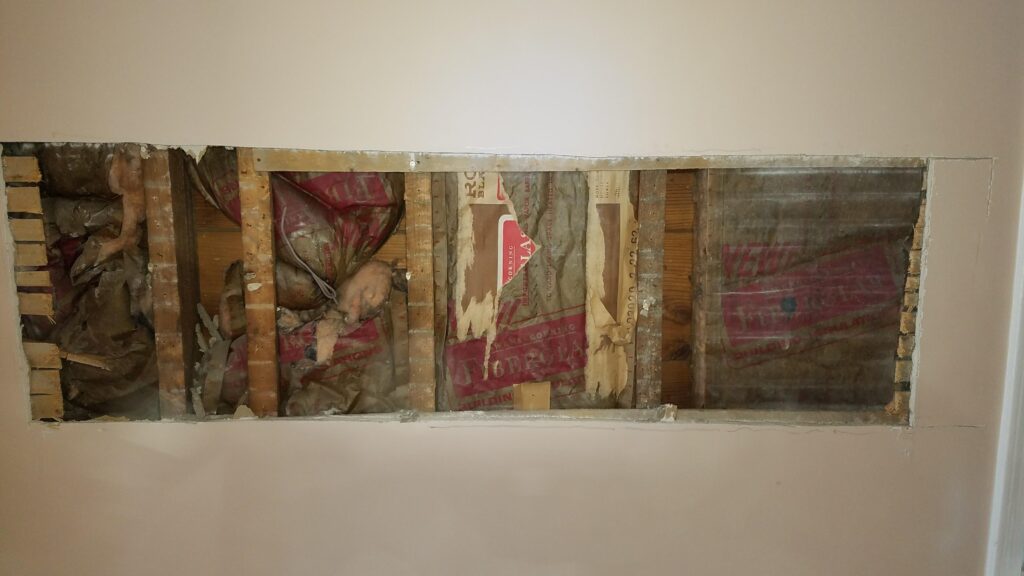
What the picture shows
Exposed stud bays containing sagging, dirty, compressed, or mold-stained fiberglass insulation.
This photo documents why retrofit insulation is needed.
Key technical takeaway
This picture justifies removing fiberglass entirely before foam installation.
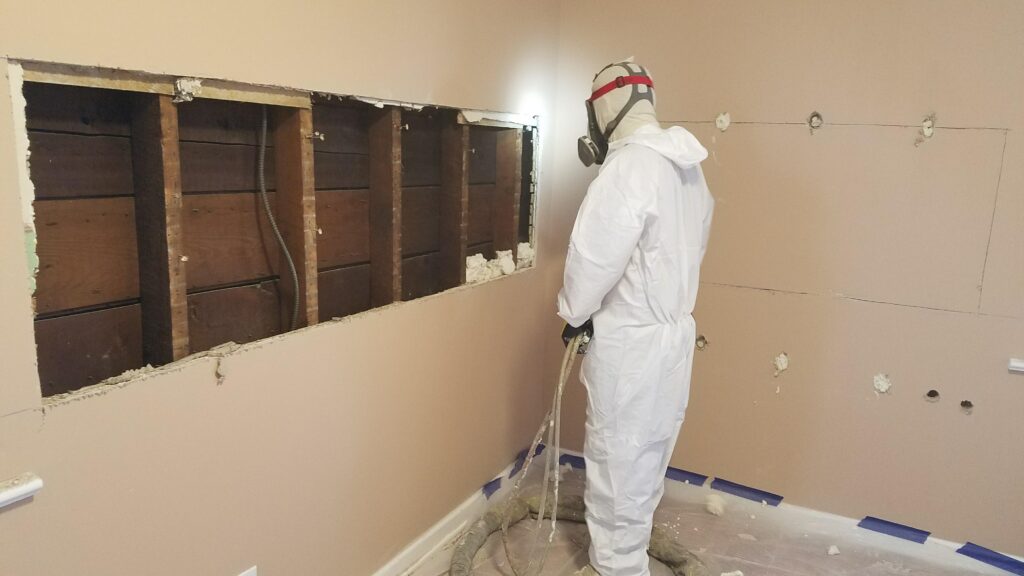
What the picture shows
Technician pulling out fiberglass batts and debris from stud bays, often bagged for disposal.
This is a critical step unique to interior retrofits.
Why it’s mandatory
Injection foam performs best in empty cavities. Leaving old fiberglass behind:
This image confirms the cavity is being properly prepared.

3

4
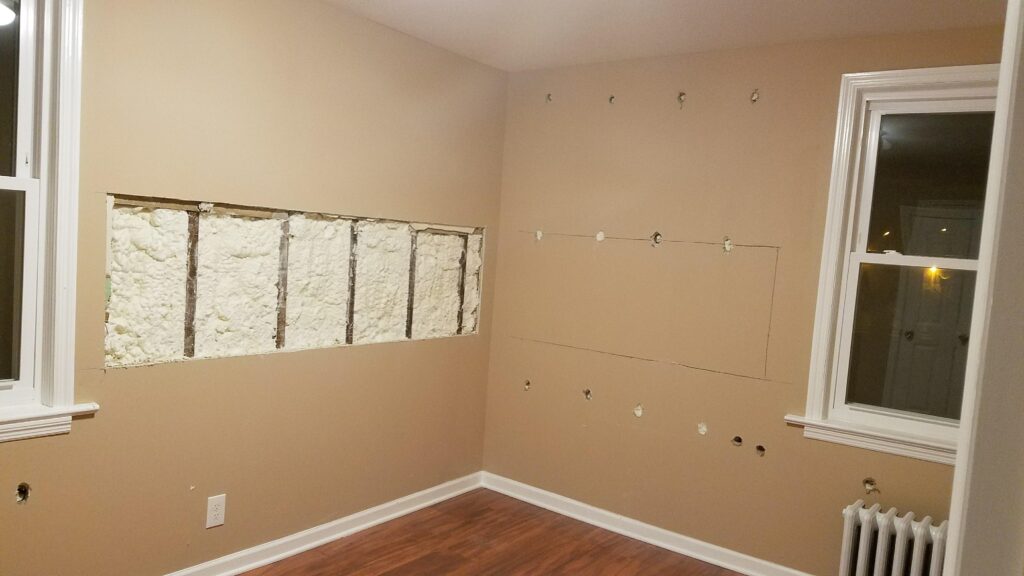
What the picture shows
Bare stud bays with sheathing visible, wiring and plumbing exposed and unobstructed.
This is the ideal condition for injection foam.
Technical significance
This photo is the “green light” moment before injection.
What the picture shows
Small 5/8″–2″ holes drilled into remaining drywall or top/bottom plates.
Even with interior access, controlled drilling may be used to reach upper and lower cavity sections and ensure full vertical foam distribution.
This image demonstrates precision access, not demolition.
5
6
What the picture shows
Injection hose or gun inserted into the cavity as liquid foam is pumped in.
This is the core retrofit action.
Technical explanation
Unlike fiberglass, the foam:
What the picture shows
Stud bays completely filled with cured injection foam.
Even with interior access, controlled drilling may be used to reach upper and lower cavity sections and ensure full vertical foam distribution.
What it represents
This confirms:
Structural note
Proper application avoids over-pressure, protecting:
This image proves professional control.

7
8
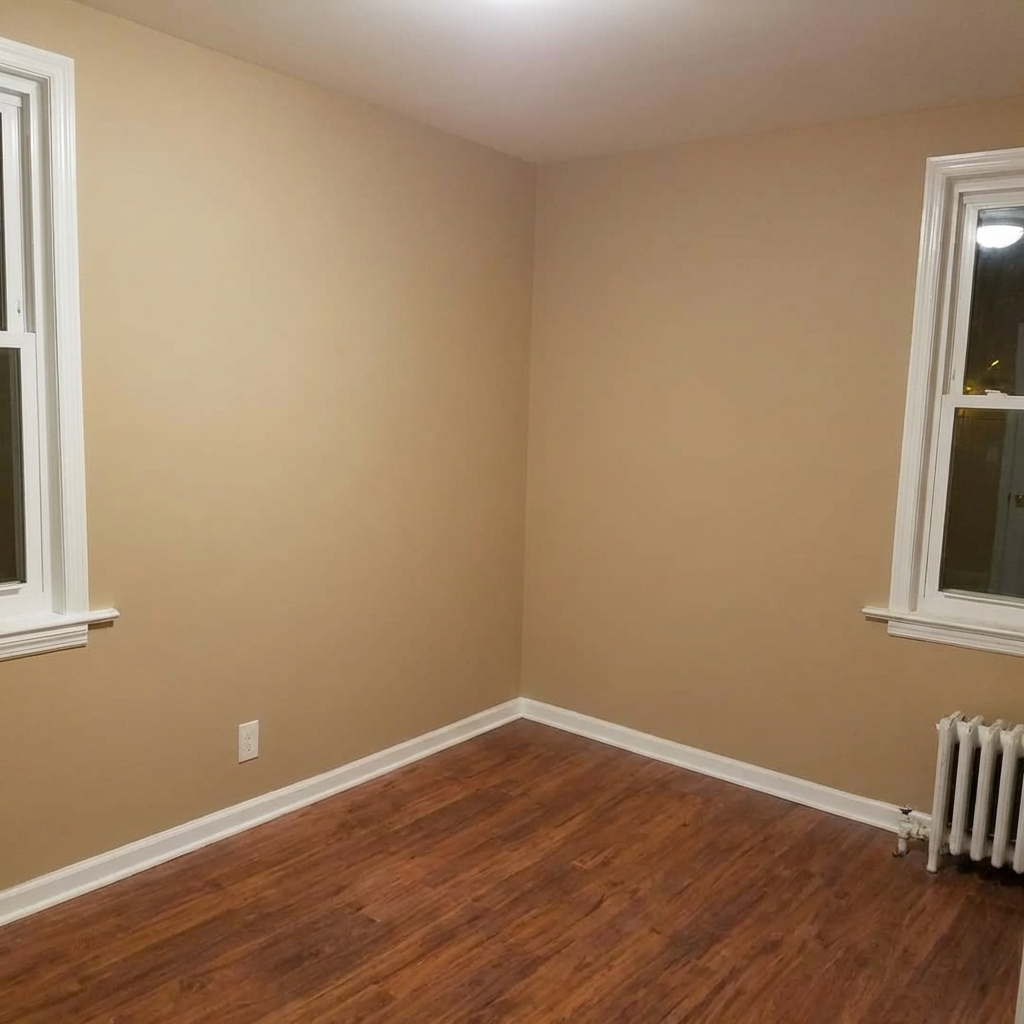
What the picture shows
Drywall sections reinstalled, seams taped, mudded, and ready for paint.
The non-disruptive finish of interior retrofit insulation.
Why this matters
This reinforces that injection foam retrofit is surgical, not destructive.
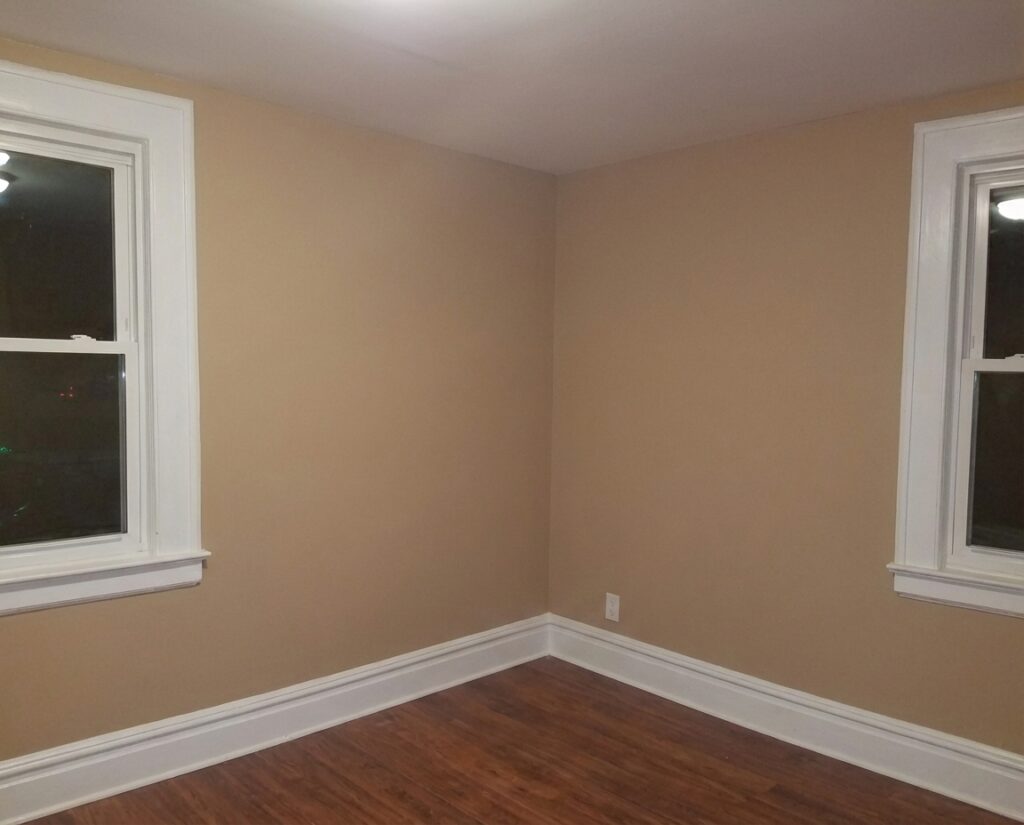
What the picture shows
A clean, painted wall — visually identical to before.
The end result:
9

| Feature | Injection Foam | Fiberglass |
|---|---|---|
| Air Sealing | | |
| Settling Over Time | | |
| Moisture Resistance | | |
| Draft Reduction | | |
| Noise Reduction | | |
Injection foam doesn't just insulate — it stops air movement, which is the #1 cause of energy loss in older homes.
Non-destructive spray foam insulation for Staten Island homes. We retrofit exterior walls from the inside to stop drafts, cut energy bills & protect older homes without demolition. Free quote!
Contact us today to schedule your Spray Foam Insulation appointment.